After having a satisfying dinner with your loved ones, the roasted chicken stood out as the highlight of the meal. However, your kitchen oven greets you with a greasy grin, reminding you of the aftermath of a delicious feast. In this article, we will discover ways to keep our ovens clean.
One option is to shut the oven door and temporarily forget about it. However, be prepared for the daunting buildup of grease and oil when you eventually open it again. Aside from the chaos, what other reasons exist for maintaining a clean oven?
Is your kitchen oven in dire need of a deep clean? Do you cringe every time you open the door and see the grease and grime that has built up over time? Fret not! In this article, we will provide you with professional tips on how to maintain your kitchen oven and keep it sparkling clean.
Maintaining a clean oven is essential not only for hygiene reasons but also for ensuring that your food tastes its best. A dirty oven can affect the flavor of your dishes and even pose a potential fire hazard. By following these expert tips, you can save time and money by avoiding the need for costly professional oven cleaning services.
From natural DIY solutions to effective cleaning products, we will explore a range of techniques that will leave your oven looking and smelling brand new. We will also delve into the importance of regular cleaning routines to prevent the accumulation of stubborn stains and food residues.
Why Is an Oven Cleaning Important?
Maintaining your oven in excellent condition is crucial for various reasons. However, the most significant factors can be summarized as S.A.F.E, which stands for saving energy and money, ensuring food quality, fire safety, and promoting longevity.
A clean oven is not only a matter of aesthetics but also a crucial aspect of maintaining a safe and healthy kitchen environment. Over time, ovens accumulate grease, food residues, and carbon deposits, which can harbor harmful bacteria and emit unpleasant odors. Regular oven cleaning helps to eliminate these issues, ensuring that your meals are cooked in a hygienic and pleasant-smelling environment.
Dirty ovens can present a range of problems that go beyond the unsightly appearance. One common issue is uneven heat distribution, which can result in undercooked or overcooked food. The buildup of grease and food residues can also increase cooking times, wasting energy and potentially affecting the texture of your dishes.
While DIY oven cleaning methods can be effective, there are certain advantages to hiring a professional oven cleaning service. Professional cleaners have the knowledge, experience, and specialized equipment to tackle even the toughest oven stains and buildups.
One of the major benefits of professional oven cleaning is the time and effort saved. Cleaning an oven can be a time-consuming and labor-intensive task, especially if you have neglected it for a while. Professional cleaners can complete the job efficiently, allowing you to focus on other tasks or enjoy your free time.
1. Saves energy and money
According to a report by the Australian Energy Rating, ovens typically consume an average of 5.78W of standby power when turned off, with an average capacity of 2-8 kW. However, these wattages can increase if the oven is not maintained and becomes dirty. When filled with residues, a dirty oven requires more energy to reach the desired temperature, resulting in higher electricity bills.
According to a study by Canstar Blue, the use of a 600-mm built-in electric oven for an hour of cooking can result in a cost of over $2. This cost can be even higher if the oven is dirty.
2. Assures Food Quality
The presence of leftover food and grease in your oven may have already gone bad, which could potentially taint the food you are currently preparing, leading to changes in taste and a decrease in food quality.
3. Fire safety
Flammable materials such as residual oil, grease, food, and dirt can cause damage to the proper functioning of an oven. Therefore, if not removed, these substances may potentially lead to a fire hazard.
4. Ensures longevity
Due to the accumulation of dirt, an oven must exert more effort in reaching and sustaining desired cooking temperatures, resulting in a shorter lifespan compared to a well-maintained oven.
How to Clean an Oven Efficiently?
If you recently purchased a new oven or are using an older model, the following expert advice will assist you in effectively maintaining your kitchen oven.
1. Cool the oven down
It is imperative to clean the oven promptly, but not at the cost of your well-being. Therefore, be sure to turn off and let the oven cool down before beginning the process of wiping and removing any leftover food and grime from its surface.
2. Remove and cleaning the oven racks
Cleaning oven racks can typically involve using degreasers, caustic soda, or steam cleaners. However, in situations where these items or tools are not readily accessible, a dishwashing liquid and a sponge can also effectively clean the racks.
To effectively remove grease from oven racks, immerse them in a mixture of warm water and dishwashing liquid overnight. Afterwards, use a sponge to soak up any remaining grease. In case of stubborn grease stains, scrub them with a cleaning toothbrush.
3. Clean the oven interior
Now, without the presence of racks, you have the freedom to easily remove food residue and clean the grease from your oven.
In case you choose to utilize commercially available cleaning products, just spray the cleaner onto the inside of the oven, allow it to sit for a minimum of 30 minutes, and then remove the loosened dirt with a wipe.
An alternative method is to create a solution with baking soda and allow it to sit on the surface overnight. Then, wipe down the interior before spraying it with vinegar and using a damp cloth for a final wipe-down.
4. Wipe the glass oven doors
Due to their delicate nature, glass oven doors are more prone to scratches. As a result, the cleaning techniques that were applied to the racks cannot be used for the doors.
To treat this specific area, use a mixture of baking soda and water on the glass surface. Leave it on for 20 minutes, then use a microfiber cloth to wipe it off, followed by rinsing with water and allowing it to air dry.
Oven cleaning products can be harsh on the skin, so it’s important to wear gloves to protect your hands.
Open windows or use fans to ensure proper ventilation while cleaning. This will help to dissipate any fumes or odors from the cleaning products.
Before starting the cleaning process, make sure the oven is completely cool to avoid the risk of burns.
How often should an oven be cleaned?
According to the experts, it is recommended to clean ovens every three months. However, there are other factors to consider when determining the appropriate cleaning frequency:
Is there any grime or grease that can be seen?
Can any odor be detected?
Is there any indication of smoldering?
If the aforementioned tips seem too daunting, you have the option to seek advice or employ the services of cleaners from Cleanrific. At Cleanrific, we guarantee that your appliances will be thoroughly cleaned.
A clean oven is not only a joy to look at but also an essential part of maintaining a safe and healthy kitchen environment. By following the professional tips provided in this article, you can keep your oven in top shape, ensuring that your meals are cooked to perfection.
When faced with a first date, job interview, or trip to the mall, the decision of what to wear is always a challenge. Despite trying on numerous blouses and trousers since the early morning, you still struggle to settle on the perfect outfit.
As expected, your wardrobe will become cluttered with clothes and accessories, causing it to suffer the most.
The contents of wardrobes are a mix of items, ranging from haphazardly folded clothing to randomly scattered pieces of paper. This disarray adds an extra layer of difficulty to the already challenging task of selecting an outfit.
At Cleanrific, we have a deep understanding of the challenges that come with maintaining clothing storage. That’s why we have compiled some helpful tips to assist you in keeping your clothing storage organized.
Are you tired of digging through a cluttered wardrobe full of clothes you don’t wear? It’s time for a wardrobe cleaning! Maintaining an organized and clean clothing storage is essential to effortlessly finding outfits and preserving the quality of your garments. In this article, we will provide you with valuable tips and tricks to help you declutter and streamline your wardrobe.
Our brand believes in simplicity and functionality, and we know that an organized wardrobe can greatly contribute to a stress-free morning routine. With our expert advice, you’ll learn how to sort through your clothes effectively, determine what to keep or donate, and create a system that maximizes storage space.
Take everything out to clean your wardrobe
Has it been a long time since you last wore your beloved blouse? It could be because it’s been buried under the pile of freshly washed laundry.
Therefore, the initial stage in organizing your closet is to remove all items. By doing this, you will have a clearer understanding and perception of the contents and available capacity of your storage.
When removing your clothing and accessories, it is important to maintain organization. Allocate specific areas for clothing, belts, ribbons, pants, and any miscellaneous items that may have found their way into your belongings.
It is important to avoid falling into the trap of nostalgia. Removing all items may be a lengthy process if you become emotionally attached to each one
Clean your wardrobe
Once all of your belongings are removed, it is time to begin organizing your wardrobe. While there are various methods to approach this task, we recommend the following routine:
A lint roller is a handy tool for quickly removing lint, pet hair, and dust from your clothes. Keep one in your wardrobe for last-minute touch-ups before heading out.
A clothes steamer is a convenient alternative to ironing and helps remove wrinkles from garments. It’s especially useful for delicate fabrics that can be easily damaged by traditional ironing.
Accidents happen, and having a stain remover on hand can save your favorite garments from permanent damage. Choose a stain remover that is safe for different types of fabrics and follow the instructions carefully.
To protect your clothes from moths and other pests, consider using moth repellents such as cedar blocks or lavender sachets. These natural remedies help keep unwanted critters at bay without the use of harsh chemicals.
1. Vacuum the wardrobe
Cleaning up dirt with water can create a mess, so it’s important to first remove the main source of dirt and dust with a vacuum, dry cloth, or duster.
2. Scrub with a dishwashing liquid
Dishwashing liquids are known to be more effective in cleaning compared to disinfectants and other cleaning products, as they do not cause significant damage or leave white stains.
For the creation of a sudsy mixture, combine one liter of water with three teaspoons of dishwashing liquid. Then, simply dip a cloth into the solution and use it to wipe the interior of your wardrobe.
3. Wipe it dry!
Once you have used the soapy solution to clean your wardrobe, be sure to remove any leftover moisture by wiping it off.
If it becomes challenging to find time for cleaning out your wardrobe, consider incorporating it into your deep cleaning routine for the house.
Now that you have finished getting your clothing storage ready, it is now time to arrange your garments.
Sort your clothes
Begin by separating your garments into bins labeled with the following:
Keep: Clothing items that are still part of your wardrobe rotation. To ensure they are well-preserved in storage, it is important to properly fold them. Additionally, organize them by style into categories such as accessories, shoes, tops, and bottoms.
Donation: If you have clothes that are still in good condition but no longer fit or have been untouched for a while, the best course of action is to donate them. By donating, you not only give your clothes a new purpose but also help reduce the amount of waste in landfills.
Given the inherent generosity of Australians, the Refugee Council of Australia’s website offers the option to support charity shops and reuse centres. Among the notable choices is Vinnies.
Throw: These items of clothing cannot be recycled, sold, or given away. Sadly, they often end up in landfills. However, you can repurpose them into rugs.
One of the biggest mistakes people make is holding onto clothes they no longer wear or don’t fit into. It’s important to regularly assess your wardrobe and let go of items that no longer serve you. Be honest with yourself about what you truly love and wear, and donate or sell the rest. This not only frees up space but also allows someone else to enjoy the clothes you no longer need.
Once you’ve organized your wardrobe, it’s important to maintain it regularly. Neglecting to put clothes back in their designated spots or failing to reevaluate your wardrobe periodically can lead to disorganization. Make it a habit to return items to their proper place after each use and set aside time every few months for a thorough wardrobe cleanout.
If you are struggling to determine which bins to place your clothes in, keep in mind the rule of six months. Consider if you have worn this in the last six months and if you will wear it in the upcoming six months.
Use hangers and baskets
The use of hangers is crucial in maintaining the quality of fragile garments and maximizing storage space. In contrast, baskets serve as a temporary storage solution for both discarded clothing items and miscellaneous objects that have unintentionally ended up in your closet.
Final Thoughts
On a daily basis, we make an effort to present ourselves in the best possible way, particularly during significant occasions in our lives. However, in our endeavor to select appropriate attire, we tend to create chaos in our closets. And unfortunately, this situation only worsens as time passes.
By utilizing these suggestions, you can effectively select the perfect attire without compromising the organization of your wardrobe. Although it may seem tiresome initially, you will eventually develop a knack for it and potentially even exceed in your efforts.
For those who are still unsure about how to proceed, Cleanrific is a dependable cleaning company that offers consultation and wardrobe cleaning services. By choosing Cleanrific, you can ensure both a well-maintained wardrobe and a polished appearance.
A clean and organized wardrobe is within your reach. By following the tips and techniques outlined in this article, you can transform your cluttered closet into a streamlined and visually appealing clothing storage space. Remember to regularly assess your wardrobe, declutter, and maintain proper storage techniques to enjoy the benefits of an impeccable wardrobe.
With a clean and organized wardrobe, you’ll save time getting dressed, extend the lifespan of your clothes, and experience a sense of calm and order in your daily life. Don’t let a messy wardrobe hold you back. Take control of your clothing storage and enjoy the ease and simplicity that an organized closet brings.
At the end of a tiring day, there is nothing better than resting on a plush and cozy mattress. It provides us with a sense of calm and well-being, but did you know that it can also trigger allergies? Surprisingly, underneath the soft surface of mattresses, there are approximately 100,000 to 10 million dust mites that can cause allergies (https://www.ncbi.nlm.nih.gov/pmc/articles/PMC5156485/). To help with this issue, we will be sharing practical tips for effectively cleaning your mattress.
In addition, mattresses are subjected to a decade’s worth of dirt, drool, dead skin, and sweat. This may seem unpleasant, but it also promotes the growth of microorganisms, including harmful ones.
According to a study conducted by Amerisleep, a 7-year old mattress was found to have four strains of pathogenic bacteria. Similarly, a research study from 2015 also discovered 4 to 16 different types of fungus thriving on older pillows and mattresses. This highlights the presence of harmful microorganisms in bedding.
According to a study, individuals typically spend around 33 years of their lives in bed, which exposes them to a significant amount of microorganisms for approximately half of their lifetime. This fact can be concerning.
It is necessary to alter these figures, not the duration of time we spend in our bed, but instead the quantity of microorganisms that accompany us while we relax. As a result, here are some helpful suggestions for efficiently cleaning your mattress.
Are you waking up feeling tired and groggy? It might be time to give your mattress some much-needed attention. Mattress cleaning is an often overlooked task that can greatly impact your sleep quality and overall health. In this article, we will provide you with some expert tips and tricks to effectively clean your mattress and rejuvenate your sleep.
Maintaining a clean mattress is essential for several reasons. Not only does it help to eliminate allergens, dust mites, and bacteria, but it also prolongs the lifespan of your mattress. Regular cleaning can prevent unpleasant odors and stains, keeping your sleep environment fresh and hygienic.
Strip the bed
To properly clean a mattress, it is necessary to expose it, correct? Therefore, the first step in cleaning your mattress should be removing the bedsheets and pillowcases.
When tending to your mattress, place your beddings in the washing machine. It is important to select a water temperature that can effectively eliminate germs without causing damage to the material.
Excessive moisture can seep deep into the mattress, leading to mold and mildew growth. Instead, opt for dry cleaning methods or use minimal water when spot cleaning.
Vacuuming your mattress regularly helps to remove dust, dead skin cells, and other debris. Neglecting this step can result in a buildup of allergens and dust mites.
Harsh chemicals can damage the fabric of your mattress and leave behind unpleasant odors. Instead, opt for natural cleaning solutions that are gentle yet effective.
Remove mattress dust and dirt
Once the mattress is uncovered, use a vacuum to clean its top and sides thoroughly. It is important to pay special attention to the seams and crevices, as these are the areas where dust and dirt tend to accumulate. Additionally, make an effort to reach as much of the box spring as possible.
The frequency of mattress cleaning depends on various factors, including your personal preference, lifestyle, and any specific issues like allergies or asthma. As a general rule of thumb, it is recommended to clean your mattress at least twice a year. However, if you have allergies or pets, it may be beneficial to clean it more frequently.
Regular vacuuming can be done once a month to remove dust and debris. Additionally, spot cleaning should be done promptly to prevent stains from setting in. By incorporating regular cleaning into your mattress maintenance routine, you can ensure a fresh and hygienic sleep environment.
Give your mattress steam to clean
Mattresses are not easily washed like your bedsheets and pillowcases due to their large size, which prevents them from fitting into washing machines. As a result, they are not regularly cleaned with hot water to eliminate dust mites.
A different option to address this issue is to use a steamer. By utilizing a garment steamer, one can steam the surface and apply pressure to the fabric, effectively eliminating dust mites that reside in the folds and crevices. Once this is completed, it is recommended to vacuum the mattress once more.
Start by removing all bedding, including sheets, pillowcases, and mattress protectors. Launder these items separately according to their care instructions.
Using a vacuum cleaner with an upholstery attachment, thoroughly vacuum the entire surface of the mattress. Pay close attention to the seams, edges, and corners where allergens tend to accumulate. This step will help remove dust, dead skin cells, and other debris.
If your mattress has any visible stains, spot clean them using a mild detergent or a mixture of water and vinegar. Apply the cleaning solution to a clean cloth and gently blot the stain. Avoid saturating the mattress with excessive moisture.
In case you do not have access to a garment steamer, your reliable iron typically suffices.
Treat mattress stains
Dealing with stains can pose a challenge. Due to the susceptibility of certain foams to too much moisture, simply pouring water to eliminate the stain is not a viable option. Additionally, the nature of the stain itself is a factor to consider. What course of action should we take instead?
In order to effectively remove biological stains such as blood, urine, and sweat, an enzymatic cleaner can be utilized. This is due to the enzyme’s capability to accelerate chemical reactions and break down the stains.
Don’t have enzymatic cleaners? Don’t worry. You can easily create a cleaning solution that is just as powerful. Combine baking soda, salt, and water or opt for the multipurpose solution of hydrogen peroxide and water.
To eliminate odors, sprinkle baking soda liberally over the entire surface of the mattress. Leave it on for at least 30 minutes, or overnight for better results. Baking soda helps absorb odors and leaves your mattress smelling fresh.
After the baking soda has had time to work its magic, vacuum the mattress again to remove any remaining residue, including the baking soda. This step ensures that your mattress is thoroughly clean and free from odors.
Consider using a mattress protector to prevent future dirt, spills, and stains from penetrating the mattress. A waterproof protector can also protect against accidents and spills, keeping your mattress in pristine condition for longer.
Dry the mattress
In order to eliminate the moisture that has been absorbed by your mattress, one solution is to expose it to the sun and open air. However, if you have limited outdoor space or the weather is not favorable, you can rely on using baking soda to absorb both the moisture and any unwanted smells. To enhance the freshness of your mattress, you can also add a few drops of essential oil.
Once a period of time has passed, use a vacuum to remove the baking soda from the mattress.
Ask for help
If you are not satisfied with your cleaning, do not hesitate to seek assistance from professional cleaning service providers such as Cleanrific.
The expertise of professional cleaners entails advanced cleaning techniques and equipment, such as ultraviolet light and allergy treatments, which can provide your mattress with the necessary intensive cleaning.
Final Thoughts
In our lifetime, our bodies will constantly shed approximately 500 million skin cells on a daily basis and produce a yearly amount of 26 gallons of sweat while in bed, as stated by WebMD and Business Insider. These are natural occurrences that have accumulated dirt on our mattresses throughout the years. Unfortunately, there is not much we can do to prevent it.
To improve our mattress hygiene, we can alter our cleaning routine. By following the advice given, we can effectively prevent dust mites and bodily waste from accumulating on our mattress.
Maintaining the cleanliness of your mattresses not only removes unpleasantness, but it also safeguards your loved ones from potential illnesses.
Cleaning your mattress is a crucial part of maintaining a clean and healthy sleep environment. By following the expert tips and tricks provided in this article, you can effectively clean your mattress, remove stains and odors, and prolong its lifespan. Remember to avoid common cleaning mistakes, use natural cleaning solutions when possible, and follow the manufacturer’s guidelines for care and maintenance. With regular cleaning and proper maintenance, you can enjoy a fresh, hygienic, and comfortable sleep experience every night.
Remember, a clean mattress leads to a restful sleep and better overall health. So, don’t neglect the cleanliness of your mattress, and start implementing these tips today. Say goodbye to restless nights and hello to a rejuvenating sleep experience!
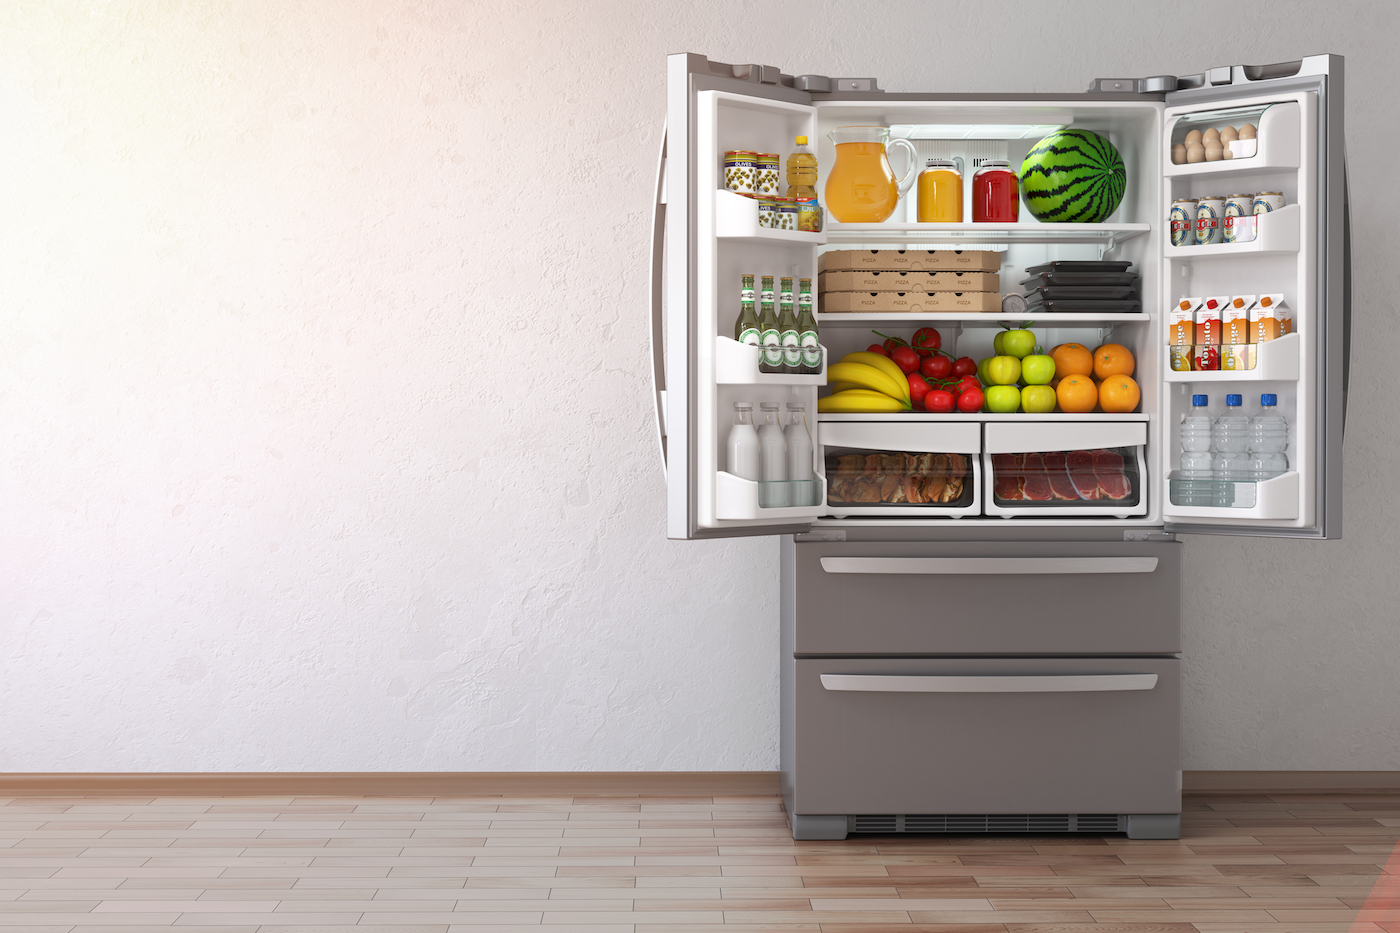
In our kitchens, refrigerators play a major role in preserving our food by keeping it frozen or chilled, as well as storing leftovers from previous meals. However, a disorganized and unclean refrigerator can be overwhelming and bothersome. To maintain a clean and organized fridge, follow the tips below for cleaning.
The germs and bacteria from raw meats, fresh produce, and spilled condiments have contaminated our refrigerators. We certainly do not want to be exposed to them.
Are you tired of opening your fridge and being greeted by a disorganized mess? Do you find yourself constantly throwing out expired food because it gets lost in the chaos? Well, it’s time to take control of your refrigerator and make the most out of it. In this article, we will guide you through the process of cleaning and organizing your fridge to ensure that it works efficiently and that you can easily find what you need when you need it.
Maintaining a clean and organized fridge can have a therapeutic effect and also make meal planning and preparation easier. To get the most out of your fridge, here are some helpful tips to follow.
Refrigerator Cleaning Tips
1. Empty the fridge
A method to efficiently declutter and arrange your refrigerator is to start by emptying it. Take note of the expiration dates and any signs of mold to separate items that are still safe to consume from those that are no longer fresh. By doing this, you can get rid of unwanted guests such as bacteria and unpleasant odors, and create more room for other items. Therefore, dispose of them accordingly.
2. Remove compartments and shelves
To eliminate any spills and unpleasant odors from spoiled food, as well as your own cleaning solution, it is important to carefully clean each drawer and shelf. This can be achieved by either using a homemade cleaner or a store-bought one. Once cleaned, wipe the surface with a soft cloth or disinfecting wipes and allow it to air dry.
3. Don’t forget the doors and walls
The fridge’s doors and walls may accumulate spills from various condiment bottles. It is necessary to thoroughly clean and wipe them to achieve a smooth and shiny surface. This will give your fridge a fresh and rejuvenated appearance. It is a pleasant task that can make kitchen chores more enjoyable.
It is important to remember to also clean the exterior and to not overlook the edges and seals.
4. Clean before putting it back
It would be ineffective to clean only the exterior of the refrigerator if you return your sticky honey jar and dirty condiment bottles without wiping them down first. Before putting them back, make sure to thoroughly clean and tightly close all the containers. This includes the unpleasant residue on the bottom and accumulated build-up around the lids. This can be quite alarming!
Don’t forget to clean the exterior of your fridge as well. Use the same solution of water and vinegar or dish soap to wipe down the doors, handles, and any other visible surfaces. Pay attention to any fingerprints or smudges and give them a thorough cleaning.
Many people make the mistake of not removing all the items from their fridge before cleaning. To properly clean your refrigerator, you need to empty it completely. Remove all the food, shelves, and drawers, and clean them separately. This ensures that every nook and cranny of your fridge gets the attention it needs.
5. Be decisive about refrigerator cleaning
When it comes to organization, it is crucial to make clear decisions on the placement of items. This applies to organizing your refrigerator as well. With multiple compartments in the fridge, it is up to you to determine which items belong in each section. It is important to consider the varying temperatures required for different types of food and arrange them accordingly.
Have you ever come across a refrigerator guide? It provides instructions on how to properly store food on each shelf of the refrigerator. Additionally, it is important to set the temperature of your fridge to 32 to 40 °F to prevent excessive spoilage due to the rapid multiplication of bacteria at temperatures between 40 to 140 °F. This information can be found on sources such as the University of Illinois Extension and The Spruce Eats.
Take out the shelves and drawers from your fridge. Wash them with warm, soapy water, and rinse thoroughly. Pay special attention to any stains or spills and use a gentle scrub brush if necessary.
Now it’s time to clean the interior walls and surfaces of your refrigerator. Mix a solution of equal parts water and vinegar or dish soap. Dip a clean cloth or sponge into the solution and wipe down all the surfaces, including the walls, doors, and gaskets. For stubborn stains or odors, sprinkle baking soda on a damp cloth and gently scrub the affected areas.
6. Use fridge organisers
Nowadays, there is a growing trend of organizers being sold in various sizes and shapes on the market. It seems that people have become fixated on organizing and adopting a minimalist lifestyle. It wouldn’t hurt to join in on this trend, would it?
Utilizing organizers that appear to be tailored for essential items in the refrigerator can greatly maximize space within the fridge. This can also reduce the amount of time spent searching for specific items, which is a desired outcome for everyone. With lightning-fast speed, you can effortlessly locate what you need!
Raw meats should be stored on the bottom shelf or in a designated meat drawer to prevent cross-contamination. Place them in sealed containers or bags to avoid any juices from leaking onto other food items.
Fruits and vegetables should be stored in the crisper drawers, preferably in perforated bags or with a damp paper towel to maintain their freshness. Some fruits, such as apples and bananas, release ethylene gas, which can accelerate the ripening process of other produce. Keep these fruits separate from other items.
The door shelves are best suited for items that have a longer shelf life, such as condiments, dressings, and beverages. Avoid storing perishable items like milk and eggs in the door, as the temperature fluctuates more in this area.
When storing leftovers, allow them to cool down before placing them in the refrigerator. Divide large portions into smaller containers to promote faster cooling. Label containers with the date and consume within a few days.
Final Thoughts
Tidying and arranging items in the refrigerator may seem like a daunting undertaking. However, this achievable duty can greatly impact our daily lives. It allows for increased food storage, saves time and money, and protects our loved ones from potential hazards of contamination. Additionally, maintaining a clean fridge can extend its lifespan and improve its performance.
In case you are still uncertain about the necessary steps to take, reliable cleaning businesses such as Cleanrific are constantly ready to provide professional refrigerator cleaning services and advice.
Congratulations! You have reached the end of our comprehensive guide on cleaning and organizing your refrigerator for maximum efficiency. By implementing the tips and techniques outlined in this article, you can transform your fridge into a clean, well-organized space that saves you time, money, and frustration.
Remember, maintaining a clean and organized fridge is an ongoing process. Regular cleaning, proper organization, and smart food storage practices are key to enjoying a fresh and efficient refrigerator. With a little effort and consistency, you can say goodbye to forgotten leftovers, expired items, and food waste.
Working from home has become the new normal for many of us, and setting up an organized and efficient home office is essential for productivity. One key aspect of creating a conducive work environment is keeping your desk clean and clutter-free. A clean and organized home office desk not only improves focus and reduces distractions but also enhances creativity and mental clarity. When your desk is free from clutter, you can easily locate important documents and supplies, saving you time and reducing stress. Additionally, a clean workspace promotes a sense of professionalism and boosts your overall mood and motivation.
To experience the benefits of a clean and organized workspace, it’s important to understand the positive impact it can have on your productivity and overall well-being.
Before cleaning the home office desk
Going into a battle without a well-thought-out strategy is a surefire recipe for defeat. In the same way, tidying up a desk without first assessing the tasks at hand will only lead to subpar and ineffective outcomes. In fact, it may even worsen the situation.
A clean and organized workspace offers numerous benefits that directly contribute to your productivity and overall work performance. Firstly, a clutter-free desk allows you to focus solely on the task at hand, without being visually overwhelmed by unnecessary items. This improved focus leads to increased efficiency and a higher quality of work. Moreover, a clean workspace reduces the chances of misplacing important documents or supplies, saving you valuable time and preventing unnecessary frustration.
Therefore, the most effective approach to beginning the task is to imagine the optimal desk arrangement and level of cleanliness that will suit your needs, and gather all the required cleaning tools. Specifically, there are certain steps you need to take and preparations you need to make:
1. Prepare and label bins
Due to the nearly two years of remote work, it is likely that your desk has gathered a considerable number of items. As a result, it will require some time to properly organize them without the use of suitable containers.
Before diving into the step-by-step process of decluttering and organizing your home office desk, it’s important to understand the common challenges that many people face when it comes to desk organization. One of the main challenges is accumulating too many items on the desk surface, such as pens, notepads, and personal belongings. This can quickly lead to a cluttered and disorganized workspace, making it difficult to find what you need when you need it.
Items can be categorized into three groups: ‘keep’ for those that are still usable, ‘donate/sell’ for items that are functional but no longer needed, and ‘throw’ for things that cannot be fixed. As a majority of these items are electronic wastes, they can be disposed of at recycling facilities in Sydney.
2. Remove everything from the table
To proceed, the following step is fairly straightforward. Remove all items from the table and organize them according to the containers you have set up. Additionally, make sure to disconnect any electronic devices on your desk to prevent potential damage to the circuitry while cleaning the space.
Begin by completely clearing your desk surface. Remove all items and place them in a designated area, such as a nearby table or box.
Once your desk is cleared, go through each item and categorize them into groups. For example, separate pens and stationery, documents, electronics, and personal items.
Assess the necessity of each item in your categorized groups. Ask yourself if each item is essential for your work or if it can be stored elsewhere. Be ruthless in your decision-making process and only keep items that are truly necessary.
Identify storage solutions for each category of items. Invest in desk organizers, drawers, and shelves to keep your belongings neatly arranged and easily accessible.
3. Sort and pile papers accordingly
It is important to thoroughly go through the stacks of papers on your desk, as there may be documents that contain valuable and confidential information. Be sure to remove any papers that are no longer needed.
Once you have finished decluttering your desk, it is time to begin the cleaning process. However, you may be wondering about the best way to clean your workspace.
How to clean your home desk
According to research conducted by the University of Arizona, desks in office settings harbor 500 types of bacteria from 20 different bacterial divisions. This discovery is quite alarming!
It is highly unlikely that you would want to have these microorganisms remaining on your skin while you are working. As a result, it is important to be meticulous in your cleaning practices. The following are the items and components that require thorough cleaning:
1. Desk Surface
To begin, clear the desk surface by removing any gathered dirt and dust with a dry cloth, duster, or vacuum. Then, proceed to sanitize the surface with gentle cleaning products or dishwashing liquid. Remember to also pay attention to the edges.
2. Computer Peripherals
Given that the majority of our tasks are carried out using our computers, it can be presumed that the computer and its accompanying devices (such as the mouse, keyboard, and headphones) harbor the highest amount of bacteria.
In order to prevent any harm to these objects while ensuring their cleanliness, utilize wipes that are both alcohol-free and antibacterial to eliminate all built-up dust, dirt, and bacteria.
Take a few minutes at the end of each workday to clear your desk surface of any items that have accumulated throughout the day. Put away items in their designated storage areas and dispose of any trash or unnecessary materials.
Set aside time each week or month to thoroughly clean your desk and workspace. Dust surfaces, wipe down electronics, and sanitize your keyboard and mouse. A clean workspace not only looks better but also promotes a healthier work environment.
Keep your desk free from unnecessary items or decorations that might distract you during work hours. Opt for a minimalist approach to create a calm and focused environment.
3. Office Accessories
A variety of office supplies such as staplers, scissors, and pens can be cleaned with water and soap instead of disinfectants due to their lack of electrical components. It is important to thoroughly dry them before returning them to their designated location.
Invest in an ergonomic chair that provides proper support for your back, promoting good posture and reducing the risk of discomfort or long-term health issues.
If possible, opt for an adjustable desk that allows you to switch between sitting and standing positions. This promotes better blood circulation and reduces the strain on your body.
Position your monitor at eye level to prevent neck strain. Use a monitor stand or adjust the height accordingly.
Ensure that your workspace is well-lit to prevent eye strain. Consider using a desk lamp or adjusting the room lighting accordingly.
Use a wrist rest or ergonomic keyboard and mouse to reduce strain on your wrists and prevent repetitive strain injuries.
After Cleaning
Maintaining your home workspace should involve more than just tidying up. It’s important to consider the long-term advantages, so it’s essential to have a plan for keeping this area clean and organized. Here are some steps you can take:
Place a bin next to your desk to avoid the accumulation of garbage.
Keep papers organized in one place.
Utilize office storage options such as drawers.
Make it a habit to regularly wipe down surfaces and items.
Final thoughts
Maintaining a clutter-free home office desk is just one of the ways we can improve our work environment. It may seem challenging initially, especially with our busy schedules. However, over time, we will come to realize that having an organized desk allows for more efficient work as we won’t waste time searching for lost items in a messy pile of garbage and chaotic office supplies.
In the event that you are unable to spare time for cleaning your desk, do not hesitate to contact cleaning companies, such as Cleanrific, to complete the task. You can also take advantage of an extensive house cleaning service from Cleanrific.Despite the growing accessibility of COVID-19 vaccines, it will still be a long time before the world returns to its previous in-person routines. In the meantime, we must adapt to the “new normal” of working remotely.
In conclusion, maintaining a clean and organized home office desk is crucial for productivity and overall work performance. A clutter-free and well-organized workspace improves focus, reduces distractions, enhances creativity, and saves you valuable time by allowing easy access to essential items. By following the steps outlined in this article, you can declutter your desk, organize your supplies, and establish a cleaning routine that promotes a productive and inviting home workspace.
Are you aware that there exists a designated day for honoring our dependable toilets? This article will provide suggestions for cleaning your toilet.
Indeed, there is a significant event on November 19 known as “World Toilet Day” (https://www.worldtoiletday.info/). This annual observance aims to raise awareness about the importance of sanitation and access to toilets, which is still a privilege for 3.6 billion individuals worldwide and 24% of the Australian population.
Is it a recent development that toilets have gained such significance that they have their own designated day? Not at all. Despite the tendency of people to simply flush and move on, toilets play a vital role in enabling the sanitation value chain by containing human waste.
If not for it, open defecation would continue to be a practice, resulting in the spread of diseases such as diarrhea. This disease is the second most common cause of death among juveniles, according to the World Health Organization.
Additionally, it is estimated that Australians utilize toilets at a minimum of one time per day according to a report from the Australian Institute of International Affairs. This serves as evidence of the significance of toilets in our everyday routines. However, are you taking sufficient measures to maintain its optimal condition?
Are you tired of dealing with a dirty and smelly toilet? Keeping your toilet clean and in top shape is essential for maintaining a healthy and hygienic home environment. In this article, we will provide you with seven expert tips to help you achieve just that. Whether you are a homeowner or a business owner, these tips are applicable to everyone.
From using the right cleaning products to implementing a regular cleaning routine, we have got you covered. Our tips will not only help you remove stubborn stains and eliminate unpleasant odors but also prevent future problems like clogged pipes and toilet leaks. Plus, we will discuss some eco-friendly alternatives to harsh cleaning chemicals, so you can keep your toilet sparkling clean while being mindful of the environment.
In case you haven’t already, consider these seven suggestions that could potentially alter your approach to toilet maintenance.
Toilet Cleaning Tips: How to Clean your Toilet
1. Disinfect your toilet with hydrogen peroxide
Instead of splurging on expensive disinfectants, you can simply utilize hydrogen peroxide, which is a resident germ killer.
According to a study conducted in 2018, it has been suggested that disinfectant may be more efficient than the active ingredients found in commercially available cleaning products, such as quaternary ammonium compounds.
According to a source, hydrogen peroxide with a concentration of 0.5% is sufficient in eliminating bacteria and viruses from toilet surfaces. This means that a small amount of this solution, specifically a mixture of 2.5 parts water and 0.5 parts 3% hydrogen peroxide, can effectively disinfect your toilets.
Allow the solution to remain on the surface of the toilet for 30 minutes before flushing to rinse.
2. Unclog toilet pipes using boiling water
The occurrence of a blocked toilet is commonly due to the buildup of oils and greases inside the pipes. An effective way to disintegrate these substances and promote the smooth flow of water is by pouring boiling water into the toilet bowl.
Hydrogen peroxide is a natural disinfectant and stain remover. Pour 1/2 cup of hydrogen peroxide into the toilet bowl and let it sit for at least 30 minutes. Scrub with a toilet brush and flush. This will help remove tough stains and kill bacteria.
3. Use a pumice stone to remove stubborn toilet stains
Any luck in getting rid of the ring inside the bowl?
A pumice stone is the solution to your concerns. You may be familiar with this type of volcanic rock, known for its ability to exfoliate dead skin from knees and elbows. However, it is also highly effective in eliminating toilet stains.
In order to prevent any scratches on the surface of your toilet, it is important to first soak the pumice in warm water. Then, use strong scrubbing motions to remove the stain and flush the toilet to remove any debris from scrubbing.
4. Give your toilet a vinegar treat
At times, there may be blemishes that cannot be eliminated even with a thorough scrub using pumice stones. These marks are often the result of hard water or water containing elevated levels of dissolved minerals such as calcium and magnesium.
Luckily, the stains are not permanent and can be effortlessly eliminated with the use of white vinegar, as suggested by Healthline. You have the option to either directly spray vinegar onto the affected area or place a paper soaked in vinegar on top of the stain and leave it overnight.
Vinegar is a natural cleaning agent that is effective in removing mineral deposits and stains. It is also a great alternative to harsh chemicals. Mix equal parts vinegar and water in a spray bottle and use it to clean the toilet bowl, tank, and other surfaces.
5. Remove and clean the toilet seat
Has the unpleasant urine odour still remained even after disinfecting the toilet bowl?
It is likely due to the accumulation of urine in the joints of your toilet seat. Therefore, it is important to remove the seats and thoroughly clean the joints for a clearer view.
The toilet seat and hinges can harbor bacteria and dirt. Take the time to clean them regularly using a disinfectant cleaner or a mixture of vinegar and water. Don’t forget to wipe down the underside of the seat as well.
A clean toilet is more than just a matter of aesthetics. It is a matter of health and hygiene. Regularly cleaning your toilet is crucial for preventing the spread of germs, bacteria, and viruses that can cause illnesses. Moreover, a clean toilet creates a positive impression on your guests and visitors, making them feel comfortable and at ease.
6. Keep your toilets rust-free using a nail polish
Despite the fact that toilets are typically constructed from ceramics, the fasteners used to connect their parts are often made of iron or a rust-prone alloy. As a result, even with regular cleaning, rust will inevitably reappear.
One possible resolution to this issue is to apply a layer of nail polish to these metallic components As the nail polish’s acetone content dissipates, it forms a protective layer on the metal surfaces. This barrier effectively prevents moisture and oxygen from coming into contact with the iron, thus preventing rust formation.
Finally, use a clean, dry microfiber cloth to dry and polish the toilet, leaving it looking shiny and clean.
Scrubbing the toilet vigorously may seem like the best way to remove stains, but it can actually damage the porcelain surface. Use a soft-bristle brush and gentle scrubbing motions to avoid scratches.
In addition, the coating aids in securing the screws to prevent any movement of the seat.
7. Maintain floor dryness
In addition to creating a potential hazard for slips and falls, wet floors also create an optimal breeding ground for bacteria. As toilets are typically connected to the floors, they are particularly susceptible to contamination.
Finally, use a clean, dry microfiber cloth to dry and polish the toilet, leaving it looking shiny and clean.
Conclusion
These suggestions serve as a gentle reminder to properly care for our toilets. While it may not be the most appealing task, just like any other furniture or fixture in our homes, toilets are also susceptible to damage and thus require proper maintenance.
One way to maintain a beautiful bathroom is by keeping the area around your toilet clean and well-maintained. This can prevent stains and dirt from ruining the appearance of your bathroom, as they are often caused by the same pests that can be found on toilet seats.
For those looking to elevate their bathroom cleaning game, there are trustworthy house cleaning services, such as Cleanrific, that can effectively remove stubborn stains and restore the pristine appearance of your toilet. Make the most out of their services by visiting Cleanrific’s bathroom cleaning tips.
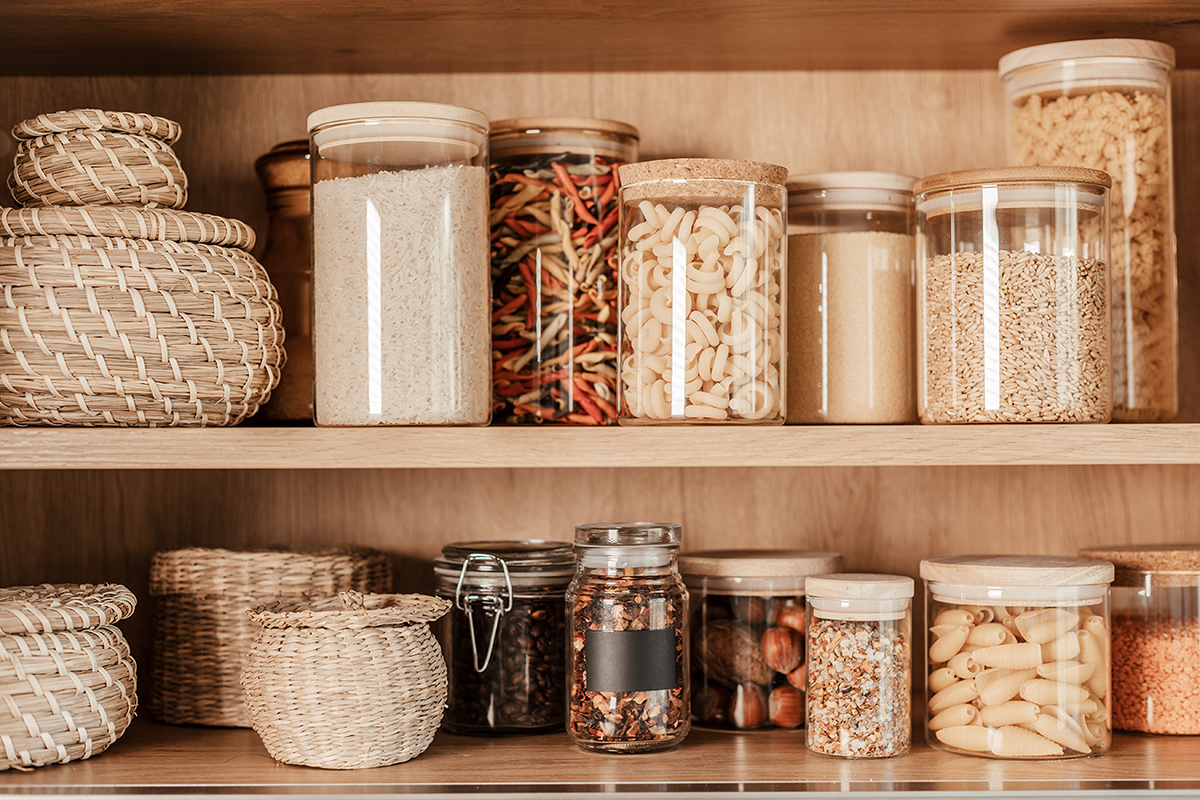
There are a variety of forms and dimensions for pantries. Regardless of their size or design, whether they contain shelves, drawers, or compartments, efficiently utilizing this area in your household ultimately comes down to organization.
An efficiently arranged pantry simplifies meal preparation and prevents unnecessary purchases of items that you believed were not available, but were in fact just concealed within the clutter.
Efficiently managing your storage and maintaining organization is crucial. To achieve this, there are several methods you can implement. Here are five straightforward yet effective tips to optimize your pantry organization.
Are you tired of rummaging through cluttered shelves and expired food in your pantry? It’s time to get organized and make the most of your pantry space! In this article, we will share five essential tips to help you transform your pantry into a haven of order and efficiency. From clever storage solutions to smart labeling systems, we’ve got you covered.
Pantry Organisation Tips
1. Empty Your Pantry
Before embarking on a complete pantry makeover, it is important to start by clearing out the space. This involves removing all items from the pantry to create an open and organized area. Once everything is out, categorize and sort the items accordingly.
After ensuring that everything is cleared, it is important to thoroughly wipe and clean the drawers and shelves. To expedite the process, you can utilize various household cleaning tricks found on this website.
Clearing out everything from your pantry is essential in creating a well-structured environment. Eliminate unnecessary items and make a list of what you intend to include in your pantry. This will simplify the task for you.
Categorizing your pantry items is a crucial step in maintaining an organized space. Group similar items together, such as grains, canned goods, spices, and snacks. This makes it easier to find what you need and prevents items from getting lost or forgotten.
To take your organization a step further, consider using clear, labeled containers for your pantry items. Transfer items like pasta, rice, and cereal into airtight containers to keep them fresh and visible. Label each container to make it easy to identify its contents at a glance. This not only adds a touch of uniformity to your pantry but also ensures that everything has a designated spot.
2. Sort Items Into Categories
Once you have cleared out your pantry, organize your items into specific groups. Group together spices, cans and jars, cereals, and baking goods.
Organize similar items together and keep frequently used items in a convenient location. For example, you could designate a lower shelf for spices, oils, and dressings, another shelf for children’s snacks, and so on.
The goal is to create product categories that are easily recognizable for anyone in your household, making it easier to locate items without much difficulty. This essentially means knowing where to find what you need for a meal or snack.
By organizing everything into different categories, you can optimize the use of your pantry and make your organization process more efficient and successful.
Use vertical magazine holders for storing cutting boards: Magazine holders can be repurposed to hold cutting boards vertically, saving valuable shelf space.
Hang a shoe organizer on the pantry door: A clear plastic shoe organizer with pockets can be used to store small items like snacks, seasoning packets, or even kitchen tools.
Utilize tension rods: Tension rods can be placed horizontally between pantry shelves to create additional storage space for items like baking sheets or cutting boards.
Create a designated “meal prep” section: Dedicate a small area in your pantry for meal prep essentials like containers, food storage bags, and meal planning tools. Having everything in one place makes meal prepping a breeze.
3. Dispose of Expired Items
As part of your household maintenance and pantry management, it is important to dispose of any items that have passed their best before date. It is not ideal to keep expired goods in your pantry, so it is best to get rid of them.
Dispose of any expired items and consider donating unused food or household items to a food bank. After organizing your pantry and discarding expired items, you will reduce food waste in your household according to this guide (https://www.smh.com.au/lifestyle/life-and-relationships/a-beginner-s-guide-to-reducing-food-waste-at-home-20210827-p58mfm.html).
The reason for this is that you can conveniently view and periodically check your possessions without any of them being concealed at the back of the shelves.
4. Use Storage Containers and Labels
The purpose of your pantry storage containers extends beyond just aesthetics. By utilizing baskets, plastic or glass jars, and canisters, you can effectively maximize the space in your pantry.
Utilizing these containers provides a more effective method for organizing your belongings. They allow you to store a larger quantity of necessary items and arrange them in a convenient manner for easy access.
To simplify the task of finding items in the pantry, it is helpful to label each container. This is especially useful when some items, such as white sugar and salt, may look similar.
By adding labels to items, it becomes easier to locate them without having to guess. However, labels and storage containers may not be necessary for items that are already compact and easily recognizable, like a typical cereal box.
5. Utilise the Wasted Space in Your Pantry
Within your pantry, there are specific areas that are commonly overlooked and left unused, such as the floors and doors. Nevertheless, by utilizing these spaces thoughtfully, you can actually make use of their added functionality.
One option for organizing your pantry is to install a can station or spice rack on the back of the door. Alternatively, you could utilize wire baskets as storage containers on the floor. To avoid a cluttered appearance, choose a size that can easily slide under the lowest pantry shelf.
Moreover, the empty wall space in your pantry can be utilized by adding extra shelves to keep your reusable grocery bags and other items. This way, you can make the most of your pantry space and maintain a neat and orderly arrangement.
6. Keep Your Pantry Clean and Organise
Efficient pantry organization is an ongoing process that requires utilizing the available space and consistently maintaining order.
Once you have established a sturdy framework and arranged suitable arrangements for your pantry, it should not be too difficult to make any necessary modifications. If you find yourself unable to maintain the system you have put in place, it may be necessary to redo the process and devise a new one.
If you are uncertain, don’t hesitate to reach out to Cleanrific for support. Our team acknowledges that you may not have enough time to begin a pantry organisation journey, therefore we are available to assist you. Inform us of your concerns regarding organisation and cleaning for your home today!
A well-organized pantry is a game-changer for any kitchen. By implementing the tips and ideas shared in this article, you can transform your pantry into a space that is not only functional but also visually appealing. Remember, the key to maintaining an organized pantry is consistency and a little bit of effort. With time, your pantry organization habits will become second nature, making your daily kitchen routines more efficient and enjoyable.